

В нашем видео на прошлой неделе вы познакомились с MikroTik CCR2004-1G-12S + 2XS и показали, какими нововведениями оснащено это устройство команда инженеров MikroTik. В сегодняшней серии его исполнение уже будет главной ролью. Вы можете узнать, как CCR2004 преодолел препятствия и какие результаты он дал в наших тестах.
Testing Maximum Throughput
To test the maximum throughput of IPv4 and IPv6 routing capabilities on a MikroTik CCR2004-1G-12S+2XS router, we need to follow these steps:
Step 1: Prepare Test Environment
- Hardware: Ensure that all interfaces are connected properly and functioning correctly.
- Software: Update RouterOS to the latest stable version.
- Tools: Use tools like iPerf or similar bandwidth testing software installed on multiple client devices.
Step 2: Baseline Measurement
Measure baseline throughput using default settings:/ip address add address=192.168.1.1/24 interface=ether1/ipv6 address add address=fd00::1/64 interface=ether1
Run iPerf tests between two clients connected via different interfaces.
Step 3: Optimize Routing Configuration
- Disable Unnecessary Services:/system scheduler remove [find]
- Optimize Queues:Configure Simple Queue rules with priority levels based on traffic type.
- Enable Hardware Offloading:For certain features like NAT, enable hardware offloading where possible.
- Use Multicast Optimization:If multicast is used, ensure proper IGMP snooping configuration.
- IPv6 Specific Optimizations:Disable unnecessary IPv6 extensions if not required by your setup.
Step 4: Performance Tuning
- Interface Bonding: Combine multiple physical ports into one logical port for increased bandwidth.
- Quality of Service (QoS): Implement QoS policies to prioritize critical traffic types.
- Routing Protocols: Use efficient routing protocols such as OSPFv3 for IPv6.
Step 5: Re-measure Throughput
After applying optimizations, re-run the iPerf tests to measure improved throughput.
Final Steps
- Document all changes made during optimization.
- Monitor system logs for any anomalies after implementing new configurations.
- Regularly update firmware and repeat tests periodically to maintain peak performance.
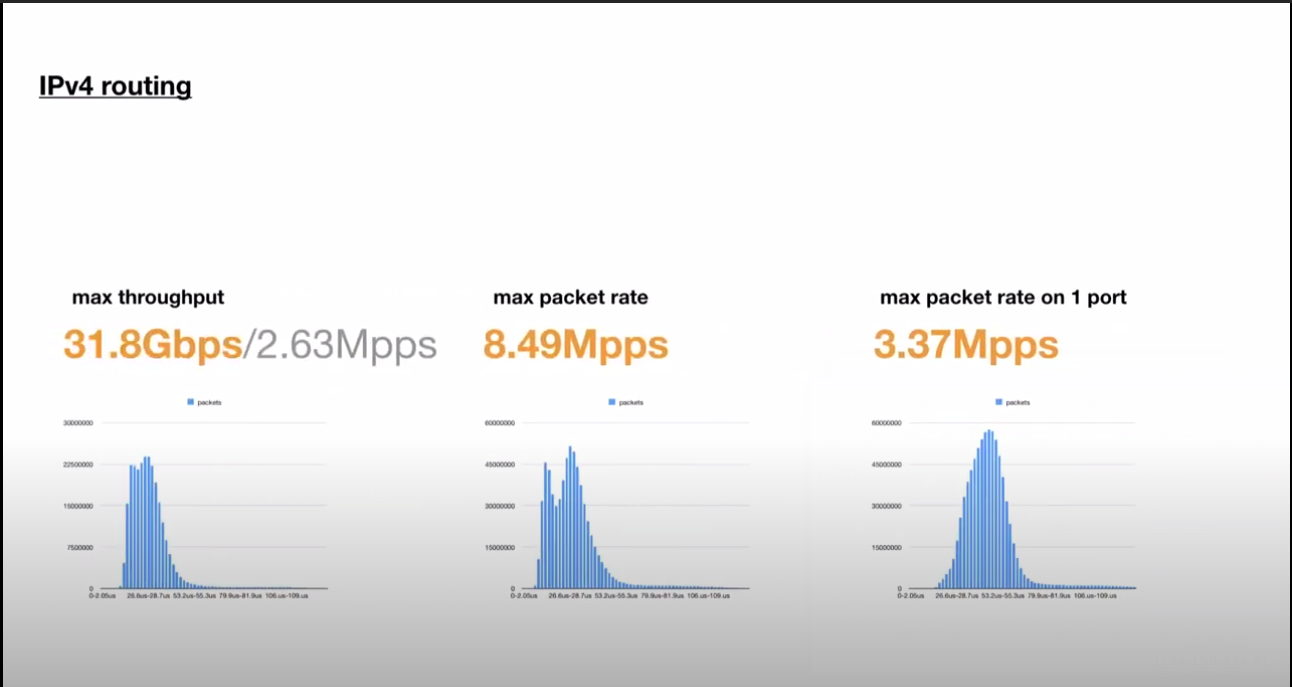
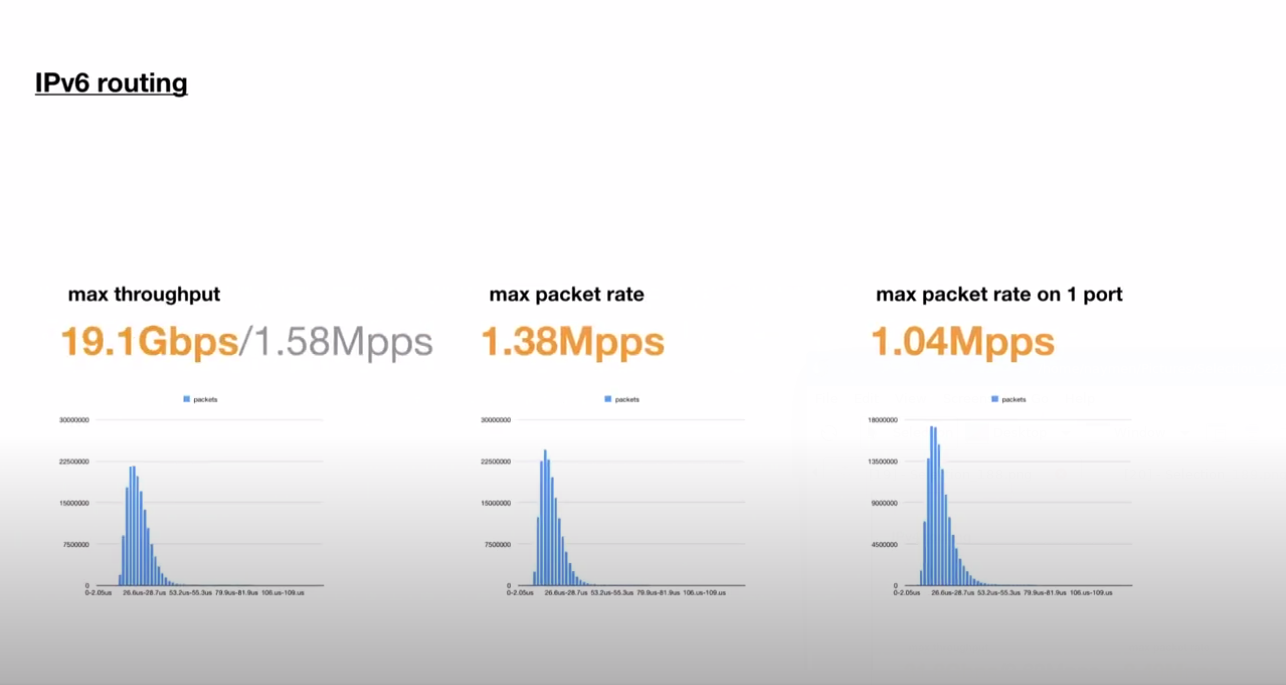
By following this guide, you can effectively test and optimize the routing capabilities of your MikroTik CCR2004-1G-12S+2XS router for both IPv4 and IPv6 networks.